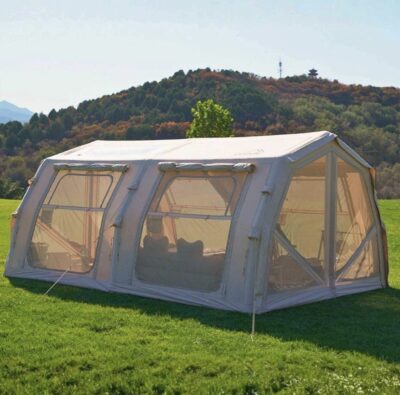
There is a unique kind of magic in a camping trip. Whether you are escaping to the rugged peaks of the Peak District or planning a family staycation on the coast, waking up to the sounds of nature is the ultimate reset button. However, as any seasoned explorer will tell you, the Great British weather is rarely a predictable ally. There is a specific, sinking feeling that comes with waking up at 2 AM to the rhythmic drip-drip-dripof a failing seam, knowing your sleeping bag is slowly becoming a sponge.
Investing in comfort: starting with the right foundation
The path to a bone-dry adventure actually begins with your choice of gear. While modern synthetic domes are popular for their weight, campers who value longevity, a superior internal climate, and true living space are increasingly turning back to the classics. Choosing a high-quality large canvas tent is often the best move for those who want a structure that breathes in the summer and holds warmth in the winter. But regardless of whether you own a luxurious cotton palace or a technical nylon mountain shelter, maintenance is the secret to a long life. Even the most premium gear requires a little TLC to ensure the rain stays exactly where it belongs: on the outside.
Is it time for a service?
Most new tents come with a reliable factory seal, but time is a persistent enemy. UV rays, dirt, and general wear and tear eventually degrade even the toughest waterproof membranes. You should plan a maintenance afternoon if you notice:
● The flake factor: inspect the shiny coating on the inside of your rainfly or floor. If it feels sticky or looks like it’s peeling off in small scales, your urethane barrier is breaking down.
● The beading test: spritz the outside of your tent with a hose. If the water stops forming “beads” and instead creates dark, soaked patches, your DWR (Durable Water Repellent) layer has retired.
● Seam stress: if the fabric is dry but moisture is creeping through the needle holes where the panels meet, your sealant has likely cracked or worn away.
The Three Pillars of a Storm-Proof Tent
To fully restore your shelter’s defenses, you need to address three distinct areas: the seams, the internal coating, and the external water repellency.
1. Sealing the vulnerable seams
Seams are the “Achilles’ heel” of any tent because every stitch is essentially a tiny puncture hole.
● The prep: set up your tent on a dry, windless day. Turn the rainfly inside out to access the underside where the sealant is applied.
● The application: use a gentle cloth and rubbing alcohol to clean away any old, peeling material. Apply a specialized seam sealer in a thin, continuous bead.
● Crucial tip: ensure the sealer is compatible with your fabric — silicone-treated fabrics and polyurethane-coated fabrics require different chemical formulas.
2. Refreshing the internal urethane (PU) coating
The urethane coating is the invisible film on the inside of your tent floor and flysheet that acts as a moisture barrier.
● The prep: lay the fabric flat on a clean, dry surface. Carefully scrub away any flaking parts with a sponge, taking care not to damage the underlying weave.
● The application: apply a fresh, very thin layer of tent sealant according to the manufacturer’s instructions. Patience is key here; you must allow the tent to air-dry for at least 24 hours before packing it away, or you risk the fabric sticking to itself.
3. Boosting the exterior DWR
DWR is the chemical magic that makes water roll off your tent like a duck’s back. It allows the fabric to remain breathable while preventing the outer layer from becoming “waterlogged”.
● The prep: clean the exterior of the flysheet thoroughly to remove dust and bird droppings. Interestingly, you don’t always need to wait for the tent to dry before this step.
● The application: spray a uniform layer of proofing spray across the entire surface. Wipe away any drips or excess with a damp cloth to prevent streaking, then let it dry in a shaded spot away from direct, harsh sunlight.

The “Weathering” secret for canvas lovers
If you have opted for a polycotton or canvas setup, the rules change slightly. These traditional materials often require a process called “weathering” before their first big outing. By soaking the tent with a hose and letting it dry completely, the cotton fibers expand and the weave tightens. This naturally seals the needle holes from the manufacturing process, creating a self-healing waterproof barrier that synthetic tents simply can’t match.
Pro-tips for a stress-free night
Beyond chemical treatments, your setup strategy plays a massive role in staying dry:
● The groundsheet rule: always use a footprint or groundsheet. A “bathtub-style” groundsheet that is integrated into the structure is the gold standard, as it prevents surface runoff from flowing into your sleeping area.
● The tarp shield: if the forecast looks particularly grim, rig a heavy-duty tarp over your tent. This creates a “second roof” that takes the brunt of the wind and rain, keeping your actual tent walls much drier and reducing condensation.
● Check the HH rating: when buying new gear, always look for the Hydrostatic Head (HH) rating. A rating of 4,000mm means the fabric can withstand a 4-meter column of water before a leak occurs. For serious, multi-season adventures, higher is always better.
Waterproofing might feel like a chore, but it is truly an investment in your future comfort. A single sunny afternoon spent prepping your gear in the garden ensures that when the clouds eventually roll in, you can sit back with a warm brew and enjoy the sound of the rain, rather than running from it.