So you’re throwing a party at your house and you want something to help create a pumping atmosphere. Well throw away that old disco ball and go pick up some basic components, as you can quickly, easily, and cheaply make yourself a LED circuit that will dance (blink) to your music!
What parts will you need?
- Tip31 Power Amplifier– Arguably the most important component in the circuit, the Tip31 Power Amplifier will ensure that your LEDs can withstand higher voltages without burning.

- LEDs- No explanation needed here really. For my circuit, I got some pretty cool Techna LED’s that were quite cheap and came in a variety of colours.
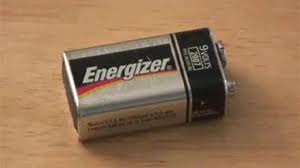
- A 9 volt battery- You can’t have a circuit without any power!
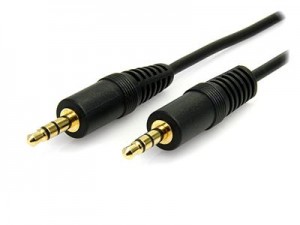
- A 3.5mm Audio Cable- This is a standard audio cable.
- A General Purpose PCB or Project Board- You will need a project board of sorts to solder your components together.
- Wires- Lots and lots of wires.
- An A4 sheet of acrylic- This is purely used for putting those final cosmetic touches to your dancing LED circuit. Remember… be creative!
Making the Circuit Step-by-Step
Step 1
Get your 3.5mm jack and strip away the casing until you reveal the three wires underneath (right, left, and ground). You then should to check that everything is working correctly, so you need to use a Digital Multimeter to confirm that the wire and part of the jack are connected.

If you don’t have a Digital Multimiter (and you are looking to invest in one), I got a pretty good Isotech meter from RS Components for £62. It’s nothing special, but it does the job.
Step 2
Next you need to attach the left or right wire to the base (left terminal) of Tip31, and the ground to the emitter (right terminal). Once you have done this, you need to connect a wire from the collector (central terminal) to the negative of the first LED. Just for reference, the shorter end of the LED is the negative or the cathode.
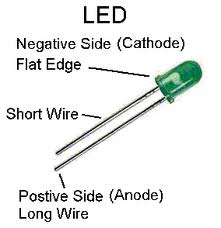
The easiest way to connect all this up is to put it in a series circuit. To do this, attach a wire between the positive of the first LED to the negative of the second, and then the positive of the second to the negative of the third. Repeat this process until you have used all of the LEDs that you want to. The last thing to do is to attach the positive of your last LED to the positive of your battery.
But this type of circuit is not the best one to use, as it is less efficient and uses more voltage.
Step 4
So if you are more confident, you can turn your series circuit into a parallel one. This can be done easily by connecting several wires from the collector of Tip31 to each of the negatives of your LEDs. At the same time you need to attach the positive of your battery to the positives of your LEDs.

Now here comes the fun part!
All you need to do now is get the jack that you have connected to your circuit and plug it into your MP3 player, laptop, PC, or television and watch your LEDs dance and flash to your music!
Have you made this circuit? If you have, why not show us a video of it in action…

